Translate

Thursday, May 28, 2015

Elements of an All-American Feast


Our nation's independence is a time for great celebration, and for most, that means a BBQ outdoors with family and friends.  The following recipes are staples in my home, and when combined, make for a fun feast of traditional American fare.

Quick, Delicious Chili

I have distinct memories of my mother waking up in the wee hours of the morning so she could begin soaking fresh pinto beans every time she would make her homemade chili.  Great stuff!  I am certainly a product of a generation who wants things faster and easier, so here is my take on chili....lickety-split!

Ingredient List

Four large cans kidney beans (1 lb, 11 oz)
For each can of kidney beans, one small can of stewed tomatoes (14.5n oz size)
1 pound ground turkey, hamburger, or bison (which was what I used)
Garlic powder
Onion powder
Garlic salt
Chili powder
Seasoned salt
Black pepper
Table salt

Begin by seasoning your ground meat with the garlic powder, onion powder, seasoned salt, and pepper.  Brown your meat in a small skillet until cooked, drain; set aside.

Combine all canned goods, and chop the stewed tomatoes.  Add approximately 1 teaspoon each of garlic salt, table salt, chili powder, onion powder, and garlic powder (or to taste).  Add prepared meat.  Cook altogether on a medium simmer until the beans are tender and all the flavors fuse together.

Serve with shredded cheddar or shredded Colby Jack cheese.


Savory Spicy BBQ Corn

Ingredient List
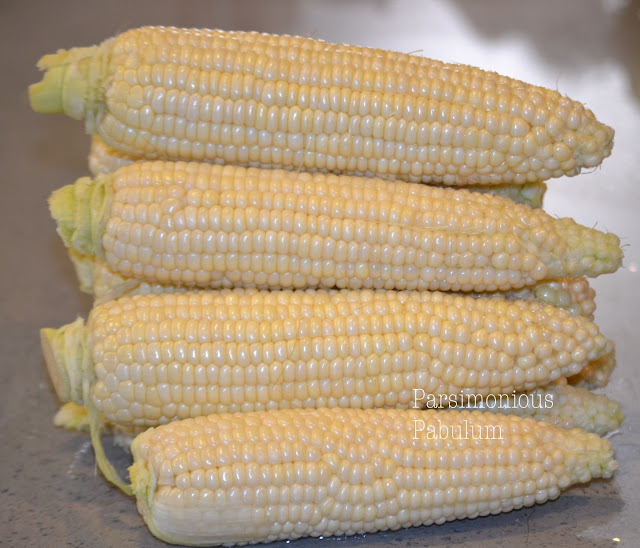

White corn, shucked and rinsed
Unsalted butter
Garlic salt
Chili powder

In a large stock pot, cook your corn until almost tender, approximately 10 minutes.  Allow to cool.  On a flat surface, lay a sheet of aluminum foil, one for each ear of corn.

Rub corn with the unsalted butter.


Sprinkle generously with garlic salt and chili powder.


  Wrap each ear of corn and BBQ over the grill until hot again, approximately 10-15 minutes.


Simple Potato Salad

I am very finicky when it comes to potato salad, and I like a much cleaner, simpler flavor for mine.  If you are like me, you may also enjoy this very simple recipe.
Ingredient List
10 russet or large potatoes
1 small onion, finely chopped
Approximately 1 cup mayonnaise
6 hard-boiled eggs, cubed
Approximately 3-6 tablespoons yellow mustard
Salt
Paprika for garnish

Peel and boil your potatoes until cooked, but not to where they are a mashed-potato consistency.  They should be a bit chunkier and firmer.  Mix all the ingredients together, reserving the paprika.  Add salt to your liking.  When all of the ingredients are combined, sprinkle over the top of the salad with paprika. 

Savory BBQ Chicken

Begin this recipe with my universal meat marinade.  You can find that recipe in the archives here.
Prepare your meat either overnight or at least 30 minutes in advance. 

Savory BBQ Sauce:

Combine altogether......
1 1/2 cups ketchup
1/4 cup brown sugar
Approximately 5 tablespoons honey
2 teaspoon brown or Dijon mustard
1/4 cup red wine vinegar
2 tablespoons Worcestershire sauce
1 teaspoon liquid smoke flavoring
1/2 teaspoon salt
1/4 teaspoon black pepper
1/4 teaspoon garlic powder
dash tabasco

Once your meat is thoroughly cooked, brush with the sauce.  Cook approximately five minutes more.

Delectable BBQ Burgers

This trick I learned from my uncle makes burgers not only have a wonderful flavor, but they practically melt in your mouth.   Prior to cooking, add a bit of barbecue sauce, mustard, ketchup, and A-1 and/or Worcestershire Sauce along with your seasonings to the meat and mix thoroughly.  Use approximately one-half tablespoon of each per one pound of ground beef.  Serve your burgers on King's Hawaiian buns.  Yummy!


To see these recipes featured in my 2015 Independence Day Celebration, you may visit the post on my other blog, Parsimonious Décor Darling by clicking here.


If you enjoy this post, please visit the archives!  You may also visit my full profile to view my other blogs. Connect with me on my Facebook Page, Parsimonious Décor Darling.   You might like to visit my other blog hubs,

The Marvelous Maison, a lifestyle blog hub and 
Frugal Fab Fashionista, my fashion blog hub. 

Follow me on Pinterest!!  Please be sure to kindly follow the board guidelines, as it takes time and effort to find fabulous pins across the Internet and Pinterest!  Thank you!  

Thank you for stopping by! ❤


Thursday, May 7, 2015

Apple Blackberry Soufflés


Aaaah, soufflé!  Light, airy, and wonderful, the soufflé is a welcome guest at any table.  Immediately following the original recipe on this post is my own adaptation from Roger Verge's Entertaining in the French Style.  The book, which was originally published in 1986, features 120 wonderful recipes from the chef and founder of three-star Michelin Moulin de Mougins.  I hope you enjoy!

 
Original Recipe:
 
Le Soufflé Léger au Reinettes (light apple soufflés)
 
Time required:  20 minutes advance preparation
30 minutes preparation and cooking just before serving
Difficulty:  Moderately Difficult
Cost:  Inexpensive
 
Ingredients:
 
     4 firm, tart apples, such as Granny Smith
     1 tablespoon water
     1/2 cup plus 2 tablespoons superfine sugar
     4 tablespoons unsalted butter
     12 eggs, at room temperature
     1/4 cup plus 2 tablespoons Calvados or other apple brandy *
 
Utensils:
 
     Medium saucepan with cover
     Medium skillet
     Whisk
     6 individual soufflé molds
     Baking sheet
     2 mixing bowls
     Rubber spatula
     Paring knife
     Cutting board
     Wooden spoon
 
Preparation:
 
***The apples and soufflé molds can be prepared several hours in advance if you prefer.
 
Peel and core the apples.  Cut 2 apples into quarters and place in a medium saucepan with the water and 2 tablespoons of the sugar.  Cover and cook until the apples begin to break down, stirring with a wooden spoon to produce a compote-like mixture.  Remove from the heat and set aside to cool. 
 
Cut the remaining apples into 1/4-inch cubes. 
 
Melt 2 tablespoons of the butter in a medium skillet.  When the butter starts to foam, add the diced apples and sauté over high heat for 3 to 4 minutes.  Set aside to cool.
 
Soften the remaining 2 tablespoons butter and use it to coat the inside of the soufflé molds.  Pout the 1/4 cup sugar into the first mold and rotate to distribute the sugar over all of the inside surfaces of the mold.  Shake out the excess sugar into the second mold, and continue in this manner until all the molds are dusted with sugar.  Place the soufflé molds on a baking sheet, making sure they are well spaced and not touching each other, chill.
 
***Twenty-five minutes before serving dessert, preheat the oven to 400 degrees F. 
 
Separate the egg whites from the yolks, being careful to leave no trace of the yolk in the whites, and place in 2 separate mixing bowls.  Make sure your eggs are room temperature.  The eggs should not be cold, or the whites won't beat well.
 
Add the remaining 1/4 cup sugar to the yolks and whisk for about 5 minutes, until light and fluffy.  Whisk in the compote and Calvados, blending well.  Gently fold in the diced apples.
 
Beat the egg whites, at first slowly, then rapidly, until stiff.
 
Fold one-third of the egg whites into the apple mixture with a rubber spatula.  Gently fold in the remaining egg whites, being careful not to deflate the whites. 
 
Divide the mixture among the 6 prepared soufflé molds, letting it spill over the rims slightly.  Run your thumb around the rim of each mold to clean it.
 
Place the soufflés in the preheated oven.  Bake for 3 to 4 minutes; reduce the oven to 300 degrees F.  Continue to bake for 17 minutes longer, and, by all means, do not open the oven!
 
Remove the soufflés from the oven and place one on each of 6 dessert plated lined with paper doilies or folded linen napkins.  Serve immediately.
 
*The Calvados in this apple soufflé recipe can be replaced by a pinch of cinnamon.
 
 
My Variation:
 
First, I halved all of the ingredients.  It made enough for 4 soufflés, and then some!
Instead of apple brandy, I used blackberry.

While baking, the individual soufflé molds were placed in a larger baking pan with 1 inch water in it (a tip from my eldest, who is in culinary school).

After the baking was complete, I dusted each soufflé with sugar and topped them with warm blackberry pie filling.
 
These turned out quite lovely, with a very light and wonderful flavor perfect for any brunch!


To see these included along with my 2015 Mother's Day table set for tea, you my visit the post on my blog Parsimonious Décor Darling by clicking here.


 If you enjoy this post, please visit the archives!  You may also visit my full profile to view my other blogs. Connect with me on my Facebook Page, Parsimonious Décor Darling.   You might like to visit my other blog hubs,

The Marvelous Maison, a lifestyle blog hub and 
Frugal Fab Fashionista, my fashion blog hub. 

Follow me on Pinterest!!  Please be sure to kindly follow the board guidelines, as it takes time and effort to find fabulous pins across the Internet and Pinterest!  Thank you!  

Thank you for stopping by! ❤


Easy Spinach and Sausage Quiche


With Mother's Day impending, my brain starts turning and churning to think up ideas for the special occasion.  Sometimes, recipes that are tried-and-true are the best ones!  This quiche is savory and delicious; it is also so easy to make!


You will need:
 
Two 6X6 baking pans
 
1 cup coarsely chopped spinach
1 clove garlic, chopped
1/4 cup chopped onion
1/2 cup heavy cream
4 extra large eggs
1-2 tablespoons unsalted butter
1/4 cup lil' smokies sausages, chopped and cooked
1/2 teaspoon garlic salt, divided
1/4 teaspoon white pepper
1/2 cup shredded parmesan cheese, plus extra 2 tablespoons
1/4 teaspoon black pepper
 
Begin by buttering your pans.  Set aside.

 
Chop all of your ingredients.
 
 
In a small saucepan, sauté the onion and garlic on medium heat with the 1 tablespoon of the butter, 1/4 teaspoon garlic salt, and 1/4 teaspoon white pepper until the onions are almost transparent.  Add your chopped sausage and cook until warm.
 
Layer your baking pans with alternating parmesan,


spinach,


and cooked meat mixture.  Repeat until all ingredients are used.

 
In a mixing bowl, beat eggs, heavy cream, 1/4 garlic salt, and 1/4 teaspoon black pepper.  Pour into your pans over the layered mixture, and add to each 1 tablespoon of shredded parmesan.  Bake for 40-50 minutes in a preheated 350 degree F oven, or until the center is set.  Serve, and enjoy!


To view these quiches featured along with my Mother's Day 2015 tablescape set for tea, you may visit the post on my other blog Parsimonious Décor Darling by clicking here.


If you enjoy this post, please visit the archives!  You may also visit my full profile to view my other blogs. Connect with me on my Facebook Page, Parsimonious Décor Darling.   You might like to visit my other blog hubs,

The Marvelous Maison, a lifestyle blog hub and 
Frugal Fab Fashionista, my fashion blog hub. 

Follow me on Pinterest!!  Please be sure to kindly follow the board guidelines, as it takes time and effort to find fabulous pins across the Internet and Pinterest!  Thank you!  

Thank you for stopping by! ❤

Sunday, April 5, 2015

Easy, Delectable Holiday Ham

A staple at my house for Easter and Christmas Dinner is a wonderful holiday ham.  Each year, we purchase a ham to be roasted, glazed, topped with pineapple, and served as part of our feast.  This past Easter, I roasted my ham in Sunny Delight and omitted the pineapple.  It was one of the best hams I've ever prepared and it was a definite hit!  Sweet, savory goodness.  I will be sharing the recipe with you today.  I hope you enjoy!


You will need:

A large covered roasting pan
Whole cloves
Black pepper
Sunny Delight or orange juice
Honey Mustard Glaze

Honey Mustard Glaze
Yellow mustard
Honey
Brown sugar

Preheat oven to 300 degrees.  I began this year with a pre-cooked ham.  You can use a raw ham as well, but I found this year using pre-cooked cuts time and makes my life so much easier, especially if you are pressed for time.  Make sure your ham is thawed completely.  Place ham into a large roasting pan you have sprinkled with black pepper. 

Gently push cloves into the skin of the ham.  You may also choose at this time to score the meat in a lattice pattern with a very sharp knife.  Pour orange juice over the ham, approximately six to eight cups. Pepper the skin of the ham.


Place into oven and roast approximately one to one and one half hour, until ham is almost completely cooked.  While roasting, I am sure to open the pan from time to time and baste the meat with the juice in the bottom of the pan.  To do so, use a standard turkey baster.

While your ham is roasting, prepare your glaze.  Combine equal parts honey, yellow mustard, and brown sugar.  The amount you need is contingent upon the size of your ham.  Ours was a medium-sized, so I used approximately 2-3 tablespoons of each.  Mix altogether until well blended.

When your meat is just about finished, use the baster to remove a good portion of the roasting drippings.  Leave approximately one inch to two inches in the pan.  Pour the glaze over the ham.  Increase the oven heat to 350 degrees.  Roast uncovered for approximately 30-45 minutes, and do not baste at this point.
 

Plate your beautiful ham on a platter of cabbage (savoy is the prettiest, but you can also use regular cabbage as I've done here),


Enjoy!!!


If you enjoy this post, please visit the archives!  You may also visit my full profile to view my other blogs. Connect with me on my Facebook Page, Parsimonious Décor Darling.   You might like to visit my other blog hubs,

The Marvelous Maison, a lifestyle blog hub and 
Frugal Fab Fashionista, my fashion blog hub. 

Follow me on Pinterest!!  Please be sure to kindly follow the board guidelines, as it takes time and effort to find fabulous pins across the Internet and Pinterest!  Thank you!  

Thank you for stopping by! ❤


Tuesday, March 17, 2015

Simple Irish Mocha


Are you a coffee lover?  Goodness knows I am.  In honor of Saint Patrick's Day, today I am sharing a very easy and simple recipe for Irish Mocha Crèmes. I hope you enjoy the post!
 

Kerig brewed mocha (I used Café Escapes), one brew for each serving
Chocolate Syrup
Crème de Menthe liqueur
Sugar
Green whipped cream for garnish

For green whipped cream:
Cool whip whipped cream
Green food color


Green Whipped Cream:
Begin by making your green whipped cream.  It is very simple.  In a small bowl, spoon an ample amount of whipped cream, enough for each mocha you intend to prepare.


Drip green food coloring into the whipped cream.


Begin with a small amount and add more as needed.  It is always easier to add more than take away.


mix the two together,


until completely blended.  Cover with saran wrap and place into refrigerator until ready to use.


Mocha:
Brew your Kerig mochas in individual cups.  To each cup, add 1 tablespoon chocolate syrup, 1/2 teaspoon crème de menthe, and 1 teaspoon sugar.  Mix altogether, and garnish with your prepared green whipped cream.


Enjoy!


If you enjoy this post, please visit the archives!  You may also visit my full profile to view my other blogs. Connect with me on my Facebook Page, Parsimonious Décor Darling.   You might like to visit my other blog hubs,

The Marvelous Maison, a lifestyle blog hub and 
Frugal Fab Fashionista, my fashion blog hub. 

Follow me on Pinterest!!  Please be sure to kindly follow the board guidelines, as it takes time and effort to find fabulous pins across the Internet and Pinterest!  Thank you!  

Thank you for stopping by! ❤

Sunday, March 15, 2015

Lickety-Split Tuna Casserole


As a child growing up, certain dishes sounded repulsive to my undeveloped ears.  The word "cheesecake" would evoke images of melted cheddar cheese oozing over the side of a pie crust.  Not nice!  It took me until I was married to be courageous enough to try it, and I immediately felt like I had been missing out my whole life.  Another dish, "tuna casserole" sounded repugnant until I tried it.  That perception couldn't be farther from the truth; this casserole is creamy, hearty, and really delicious.  Thank goodness the palate develops with maturity!  This recipe is super quick and easy; perfect if you are observing lent, and this dish is stick-to-your-ribs fare that will have your family begging for more.

Ingredient List:

Two boxes of instant parmesan noodles
One twelve ounce can of all-white albacore tuna (in water, NEVER oil)
Approximately two cups frozen sweet or snow peas
3/4 cup milk, divided
1/2 teaspoon salt
Two tablespoons butter
One cup crushed saltine crackers or croutons
1 cup grated Parmesan, divided
Fresh cracked black pepper


Open tuna, drain.  Set aside.  Cook noodles according to package directions.  Add frozen peas, tuna, and 1/4 cup of milk to pan and cook until peas are heated.  In a large casserole, combine 1/2 cup Parmesan, butter, salt, remaining milk, and noodle mixture.  Mix altogether.  

When I cook, I like things fast and uncomplicated...likely due to the fact that I am feeding seven!  To top this casserole, panko is a lovely idea.  However, if you don't have it on-hand, saltines or crushed croutons work amazingly well.


Sprinkle your crushed crackers over the casserole along with the remaining grated Parmesan.  Bake at 350 degrees for approximately 10-20 mins or until crust is golden brown and casserole underneath is bubbly.  

Serve with freshly cracked pepper!  Enjoy!


If you enjoy this post, please visit the archives!  You may also visit my full profile to view my other blogs. Connect with me on my Facebook Page, Parsimonious Décor Darling.   You might like to visit my other blog hubs,

The Marvelous Maison, a lifestyle blog hub and 
Frugal Fab Fashionista, my fashion blog hub. 

Follow me on Pinterest!!  Please be sure to kindly follow the board guidelines, as it takes time and effort to find fabulous pins across the Internet and Pinterest!  Thank you!  

Thank you for stopping by! ❤


Wednesday, February 25, 2015

Easy Asian Chicken Salad

As winter begins to finally fade away, my palate almost always begins to crave a lighter menu.  It may have to do with some sort of evolution:  when it is cold, we like heavier foods, packing on the pounds (oh, dear), to ensure our warmth.

Now that it at last beginning to look like Spring may arrive, it's the perfect time for fresh salads.  This recipe is simple, easy, and infused with wonderfully sweet and exotic flavors.

You will need:

Skinless, boneless chicken breasts
Orange juice
Unsalted roasted slivered almonds
Crispy dried wonton or chow mein noodles
Spring greens
Water chestnuts
Canned mandarin oranges
3-5 tablespoons peanut or vegetable oil

I begin by butterflying my breasts.  Butterflying is usually preformed prior to grilling meat, but I also do it here to ensure the meat is flavorful throughout.


Place the breast meat into a bowl and pour enough orange juice into the bowl so that it nearly covers or just covers the breast.  Place in refrigerator and allow to marinate for 30-45 minutes.

Heat your oil on medium to high heat.  Season your chicken, and reserve the marinade. For this recipe, I didn't want strong or conflicting flavors to compromise the sweetness of the meat, so I used a lighter hand than I typically do.  I seasoned the meat with onion powder, garlic powder, and a bit of regular table salt.  You may also opt to use Kosher salt.

When the oil is hot, place breasts into the pan, and sear on both sides. 

When the meat is seared, but not cooked through, add approximately 1/4 cup of the orange juice you used to marinade the meat.  Reduce heat to medium and continue to heat until all liquid is reduced, and meat is cooked through.  As your meat is cooking, use this time to open your canned mandarins and canned water chestnuts.  Drain both and place into a container in the refrigerator.  Remove meat from heat and place into a clean dish and put the dish into the refrigerator until the meat is cold.

When all of the elements you placed into the refrigerator are completely cold, it's time to construct your salad.  Cut your chicken into bite-sized pieces. Set aside.

For this salad, I love a spring green mix, which includes earthy and tart, semi-bitter leaves such as baby spinach and arugula. 

Toss your greens with:
your chicken, slivered almonds, wonton or noodles, mandarins, and water chestnuts.


Enjoy!  This salad is best with an Asian Sesame dressing, or a light and fruity vinaigrette such as raspberry walnut or sweet balsamic.


Variation:  If you would like to add another dimension, you can consider adding steamed, cooked edamame.  Just be sure you also cool the edamame after cooking and prior to adding.


If you enjoy this post, please visit the archives!  You may also visit my full profile to view my other blogs. Connect with me on my Facebook Page, Parsimonious Décor Darling.   You might like to visit my other blog hubs,

The Marvelous Maison, a lifestyle blog hub and 
Frugal Fab Fashionista, my fashion blog hub. 

Follow me on Pinterest!!  Please be sure to kindly follow the board guidelines, as it takes time and effort to find fabulous pins across the Internet and Pinterest!  Thank you!  

Thank you for stopping by! ❤